User Management

This module allows you to manage users in the company. CENTAGATE Cloud allows a Company Administrator to add users with role Company Admin, Group Admin and User.

User List

1. Click Users → User List.

Figure 1(a): User List button

Figure 1(b): User List

2. You can enter the keyword you want to search for inside the Search field and click on the button. Additionally, you can filter the user list by:

a. Role. List of roles will be shown here.

b. Status. The status will include:

  • Active. Users who are active and can use CENTAGATE.
  • Inactive. Users who are not active and cannot use CENTAGATE functionalities.
  • Locked. Users who are locked due to multiple trial of failed authentication. The number of allowed authentication and the lock period are configurable at the Group Policy.
  • Never Login. Users who are never logged-in into the CENTAGATE.
  • Pending Activation. Users who have not completed the registration process.
  • Dormant. Users who are not active for specified amount of time. The dormant period is configurable at the Group Policy.
  • Incomplete. Users who are created but have not had any SMS token registered under them.
  • Pending Add. User who are created a user and required to get approval from another admin.
  • Pending Update. User who are updated a user details and required to get approval for another admin.
  • Pending Delete. User who are deleted a user and required to get approval from another admin.
  • Rejected. User activation is rejected.
  • Deleted. User that has been deleted.

c. For each of the user, you can click Update the link or the More link. Options of the More link include:

  • Manage SMS Token. Allows you to register or unregister SMS tokens.
  • Manage the OTP Token. Allows you to register or unregister OTP token.
  • Manage the FIDO Token. Allows you to register or unregister FIDO token.
  • Manage Device. Allows you to register or unregister mobile device.
  • Unlock User. Only shown when the user is locked. It allows you to unlock the user immediately. Based on the Group Policy (Please refer the Section 10.2, Item 4.), some users will be automatically unlocked after a certain amount of time.
  • Activate User. Allows you to directly activate the user.
  • Reset Password. Allow you to reset the password for the user.
  • Configure Contextual Authentication Policy. Allows you to configure the authentication policy used for white-listing and black-listing the authentication based on the TWO (2) contextual attributes, which are the IP address and Country.

Add User

1. Click Users → Add User.

Figure 2: User List and Add User

2. You need to fill in all the fields that are marked with *

Figure 3: Add User

3. Choose the roles for the new user. System come with two default roles, which are:

  • Company Admin:- All users with this role have the capability to manage the full aspect of their company.
  • Group Admin:- Manage user-management under their group and group management which is they are assigned inside the CENTAGATE Cloud system.
  • User:- All users with this role have limited access to the CENTAGATE Cloud. They are only able to do self-service operation inside the CENTAGATE Cloud.

Figure 4: Role

4. Click on “Click to show more details…” to enter more fields: Unique ID, Application ID, Client ID and User Type.

Figure 5: Unique ID, Application ID, Client ID and User Type

Update User

1. Click Users → User List.

2. Click on the Update link from the user list.

Figure 6(a): User List

Figure 6(b): User List

3. You can change the user’s first and last name, time-zone, group name, address, email and status. Role and Username are not allowed to be modified.

Figure 7: Update User

3. If user wish to insert Client Id, Unique Id, Application id, or User Type. Please click the more details at the bottom Update User page.

Figure 8: Click to show more details

3. After click the button user then the Unique Id, Application Id, Client Id, and User Type text field will display.

Figure 9: Unique Id, Application Id, Client Id, and User Type Text Field

Delete User

1. Click on the Update link at the user list.

Figure 10: User List page

2. Then navigate to the bottom of the page and then click on the Delete button.

Figure 11: Delete User

Send Invitation

1. Click Users → Send Invitation.

Figure 12: Send Invitation User

2. Once inserted the email click on the Submit button to send the auto-generated email.

Figure 13: Send Invitation Dialog Box

Import Users

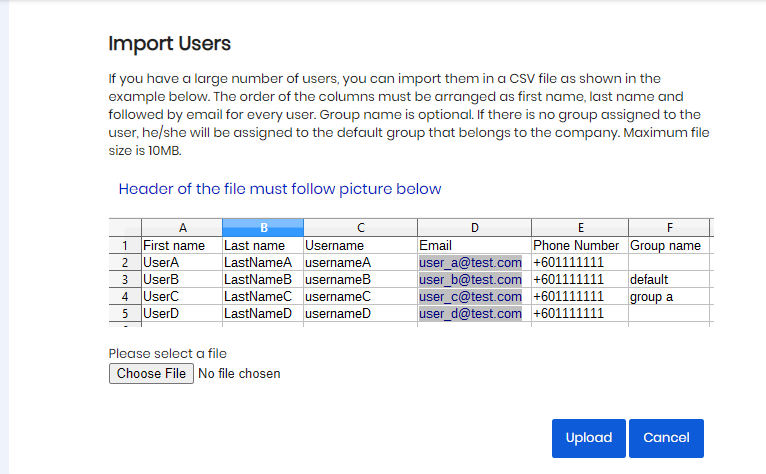
If you have many users, you can import them in a CSV file. The maximum file size is 10MB.

The order of the columns must be arranged as first name, last name and followed by email for every user.

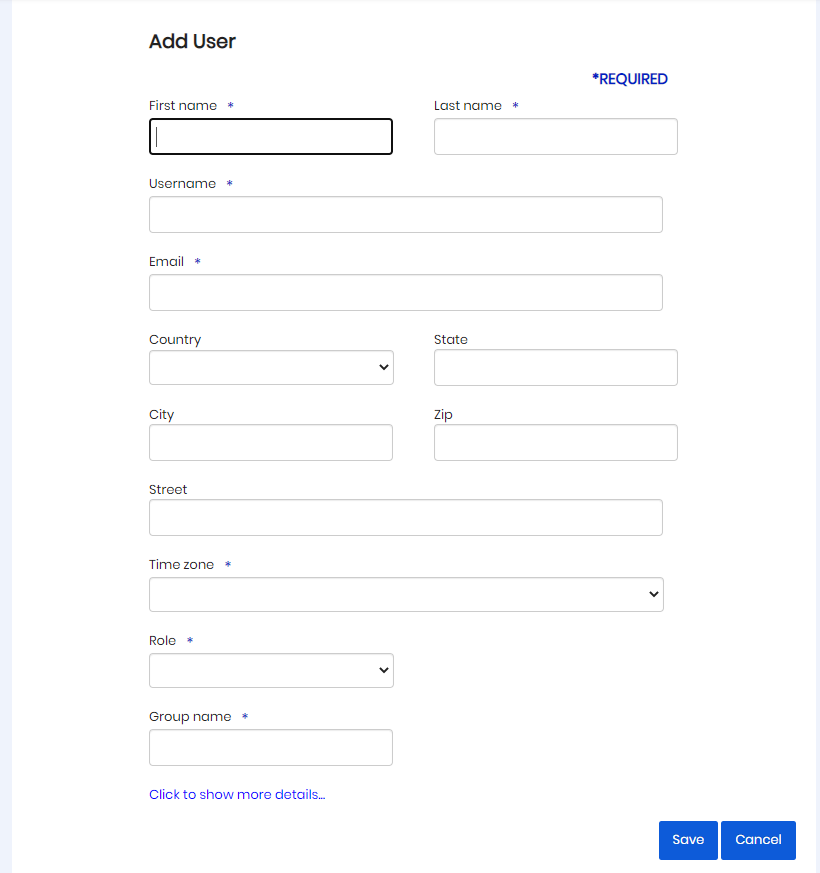
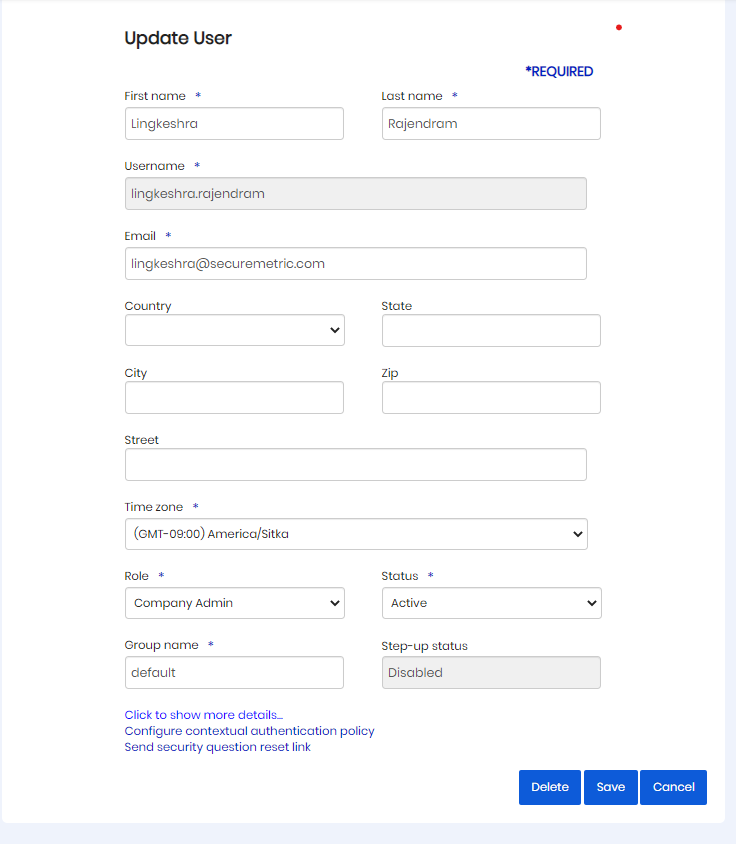
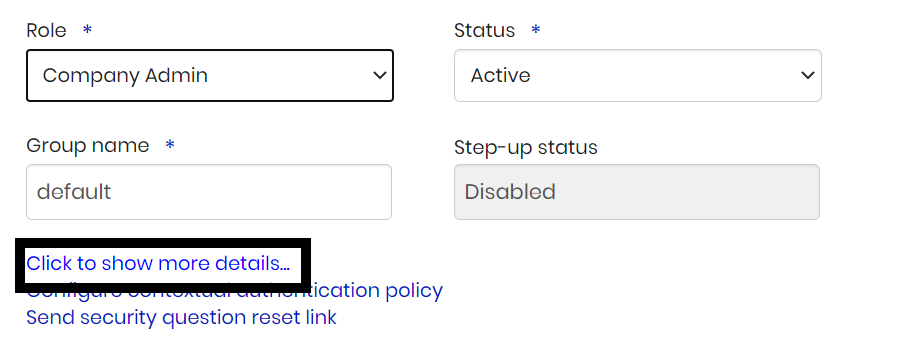
The group name is optional. If there is no group assigned to the user, he/she will be assigned to the default group that belongs to the company. 

Figure 14: Import Users